Getting Started
The Media Library is a centralized location to process, store, and stream your audio and video content. Any media files you upload or create are saved directly in the Media Library repository. In addition to media files, the Media Library also supports non-media assets such as Microsoft Office documents, images, and PDFs.
You can use the Media Player and Record Video features to create and share content for discussions, assignments, and other course activities.
The key thing to understand is that the Media Library is tied to your user account, not to a single course. When you upload or record something, it goes into your personal Media Library repository. So it's not that each course section has its own separate library that resets—your library follows you, and you can access and reuse the same assets across the different course sections you teach.
On visibility, an asset in your Media Library is owned by and visible to you by default. Other teachers don't see your library, and students don't browse it directly. A student only sees a specific media file when you actually place it somewhere they have access to—embedding it in a content topic, a discussion, an assignment, an announcement, and so on. Putting a file in your Media Library does not by itself expose it to anyone.
You can use the Media Player, Record Video and Upload a Document features to create and share content for discussions, assignments, and other course activities.
Note: Your capabilities in the Media Library may vary depending on your institution and assigned permissions. If a feature you need is not available, please contact the Help Desk for assistance.
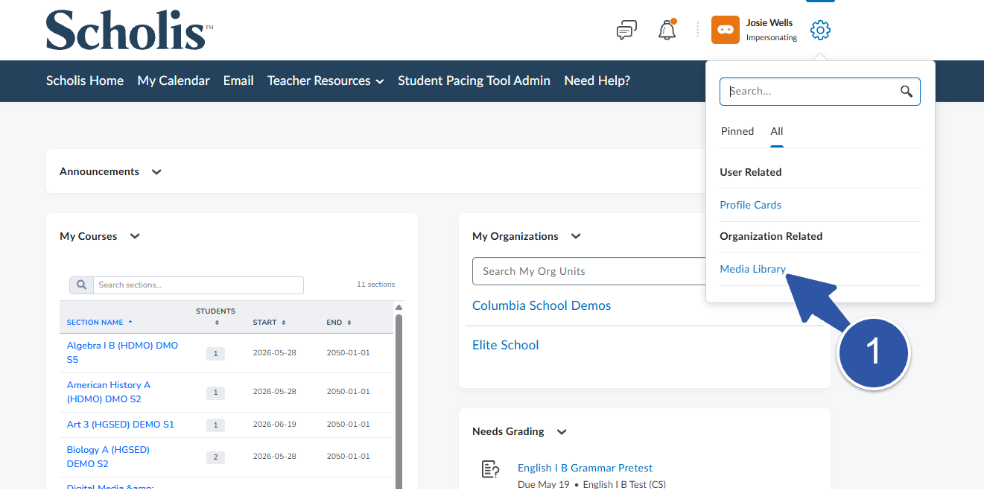
Step 1: Select Media Library from Cog Wheel
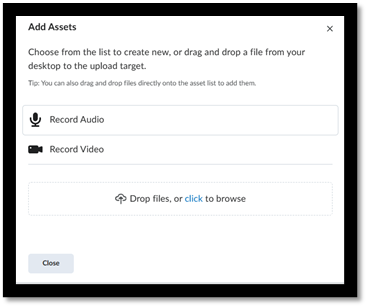
Click Media Library to upload a media file from your computer or capture audio-video content directly in the Media Library. This is where you bring new videos, recordings, images, or documents into your repository.
Note: The Create Presentation option is only available with a Creator+ subscription and the Enable Capture presentations permission, so you may not see it.
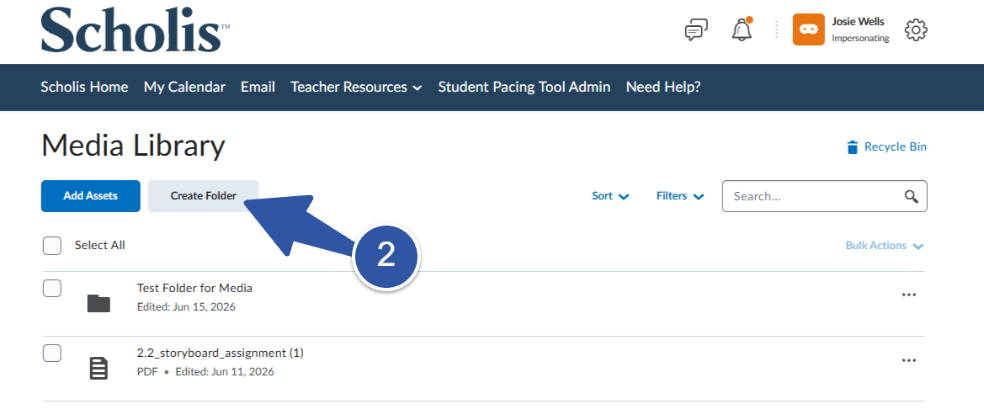
Step 2: Create a Folder
Click Create Folder inside the Media Library to create folders and organize assets of a similar nature together in one place. Folders help keep your recordings, images, and documents grouped so they are easy to find later.
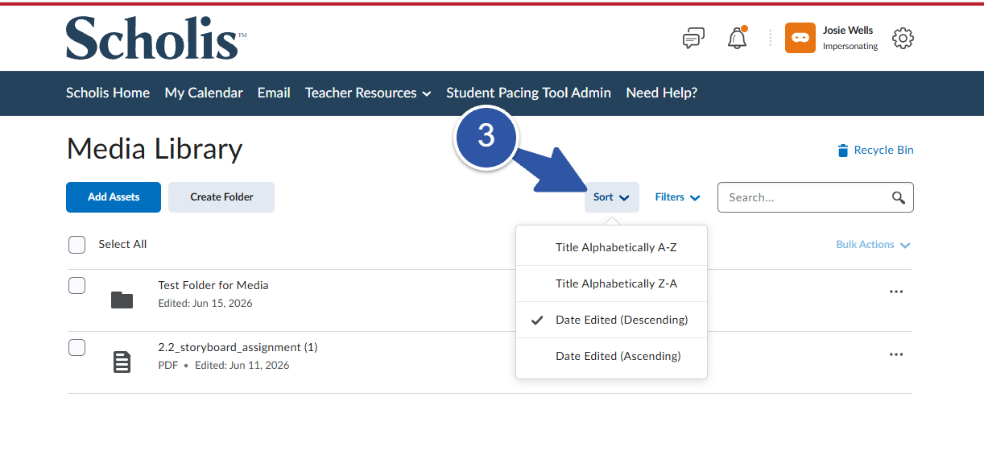
Step 3: Sort Your Content
Use the Sort option to arrange your content so the file you need is easy to locate. You can sort:
- Alphabetically by name.
- By the date the asset was last edited.
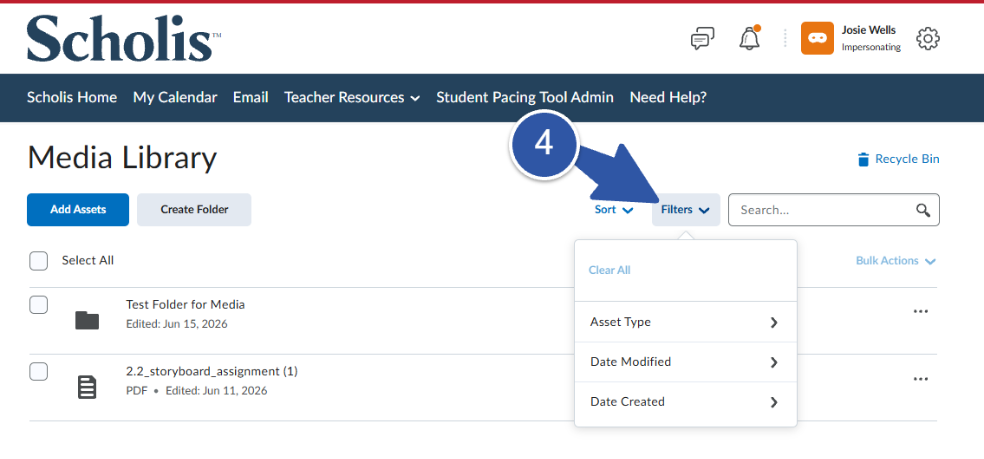
- Asset Type – show only videos, images, documents, and so on.
- Date Created – show assets from a specific time frame.
- Date Edited – show assets based on when they were last changed.
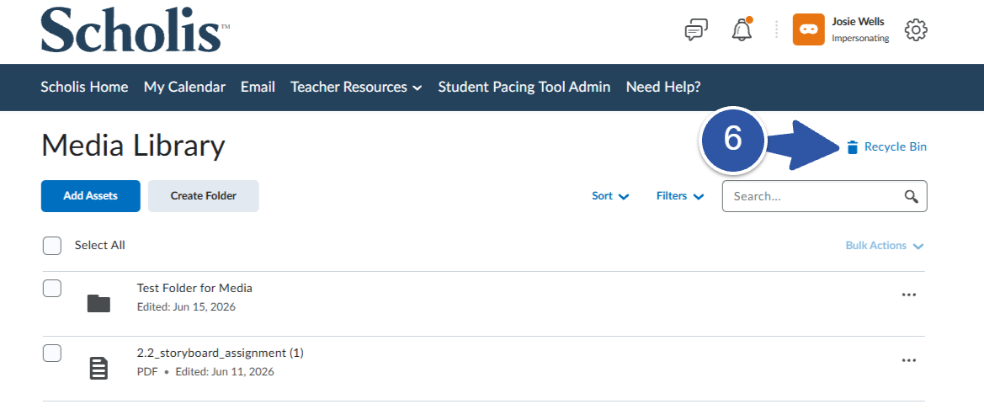
- Check how long deleted files will be stored before they are permanently removed.
- Restore selected files you did not mean to delete.
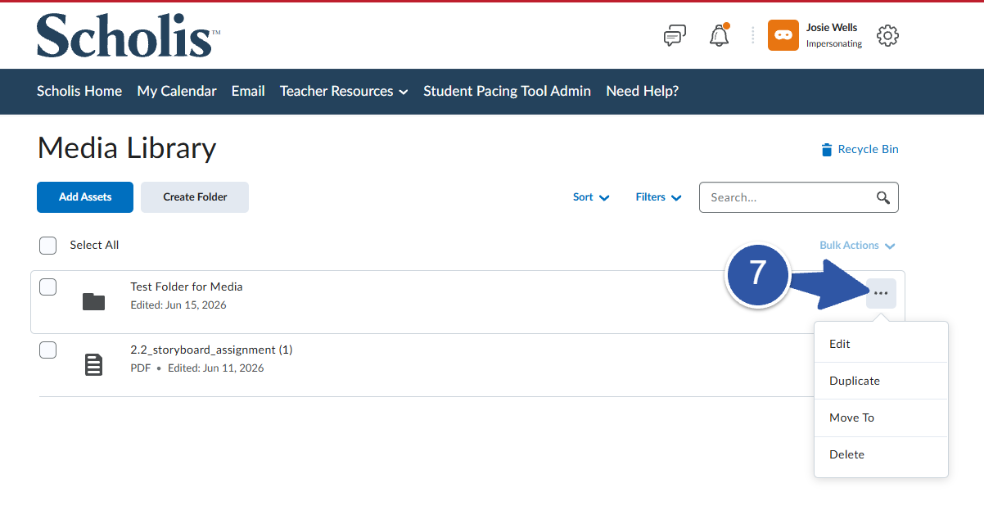
- Images: Edit, Move To, Transfer Ownership, or Delete.
- Documents: Preview, Download, Manage Versions, Move To, Rename, Edit Description, Transfer Ownership, or Delete.
- Audio / Video files: Preview, Download, Edit, Manage Versions, Move To, Rename, Edit Description, Transfer Ownership, or Delete.
Step 4: Filter Your Content
Use the Filter option to narrow the view down to just the assets you want to see. You can filter by:
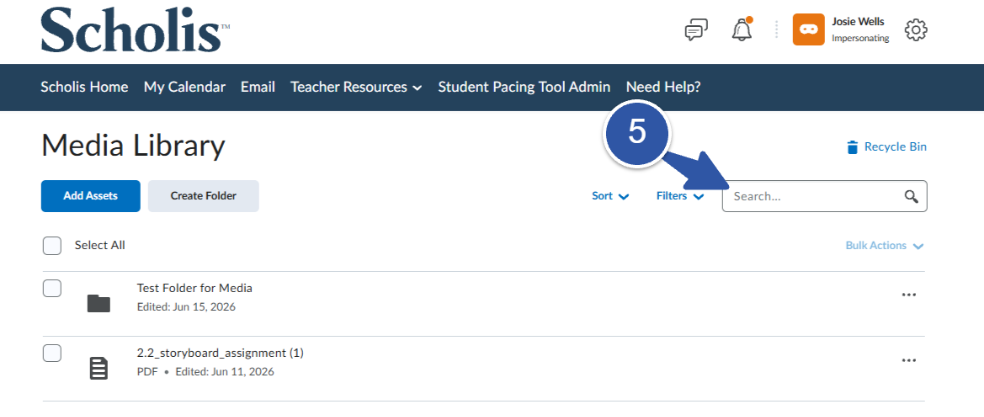
Step 5: Search
Use the Search bar to find any content across the entire Media Library repository. This is the quickest way to locate a specific file by name when you have a large collection.
Step 6: Recycle Bin
Click the Recycle Bin to see files that have been deleted. From here you can:
Important: Deleted files are only kept temporarily before permanent deletion, so restore anything you need before it is removed for good.
Step 7: Use the Actions Menu
Click the Actions menu (the ••• icon) on any asset to see the options available for that file. The choices depend on the type of asset selected:
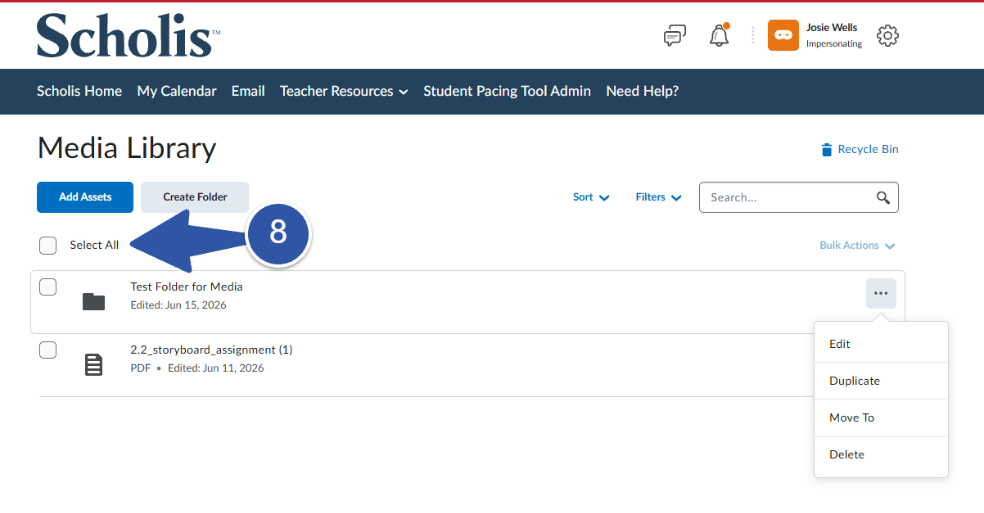
Step 8: Select Assets
Click the Select All checkbox to select every asset in the Media Library at once, or click the individual checkboxes to select only specific files. This is useful when you want to move or delete several assets together.
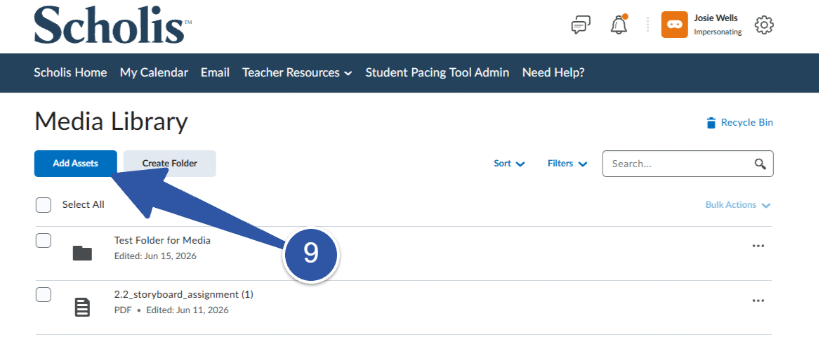
Step 9: Add a New Asset
Click the Add Asset button to begin adding new assets to your Media Library.