Step 1: Log in to Scholis
Go to lms.scholis.com and log in with your credentials to reach your Homepage.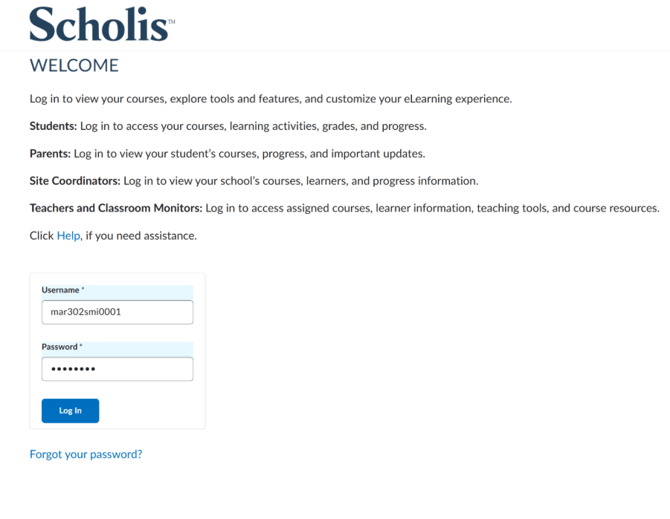
Step 2: Open the Account Menu
In the top-right corner of the page, click your name/initials avatar (e.g., "MS").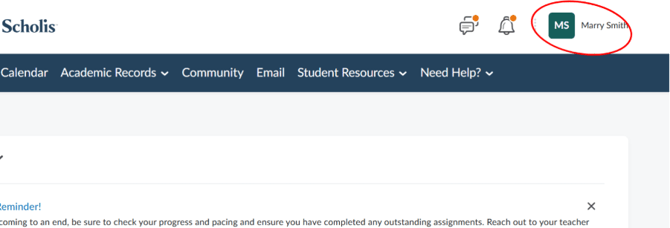
Step 3: Select Account Settings
From the dropdown menu that appears, click "Account Settings."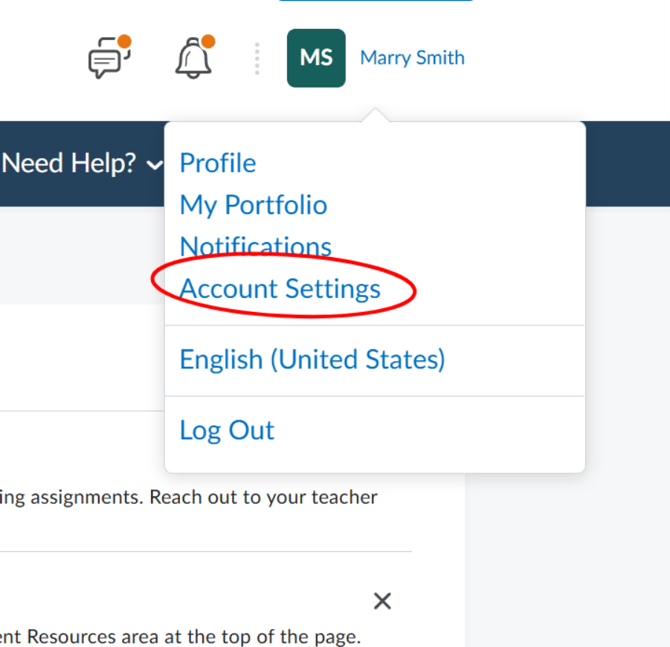
Step 4: Locate the Time Zone Section
On the Account Settings page, scroll down past "Locale & Language" until you reach the "Time Zone" heading.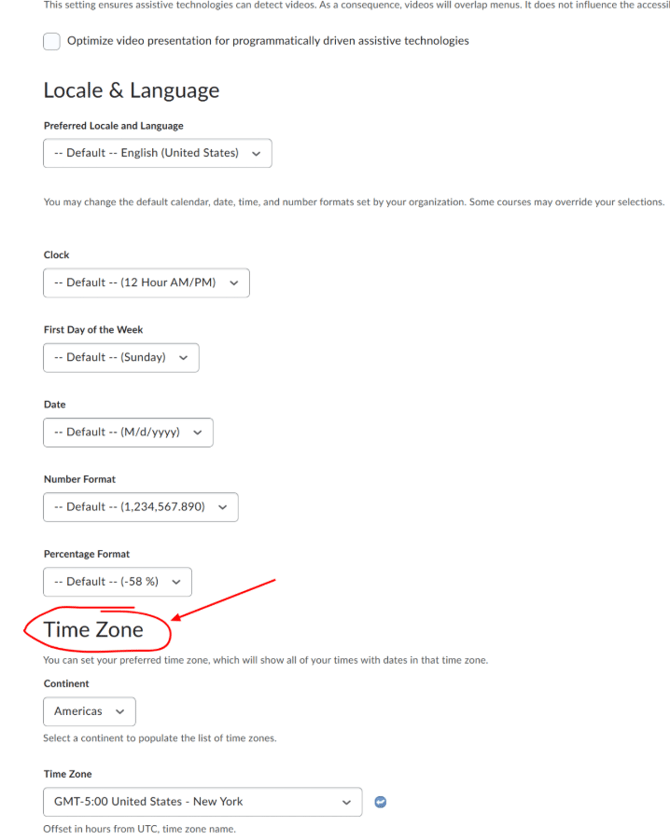
Step 5: Select Your Continent
Use the "Continent" dropdown to choose the continent your time zone belongs to (e.g., Americas, Europe, Asia). This filters the list of available time zones shown in the next field.
Step 6: Select Your Time Zone
Use the "Time Zone" dropdown to choose your specific city/region (e.g., "GMT-5:00 United States - New York"). Each option shows the UTC/GMT offset alongside the country and city.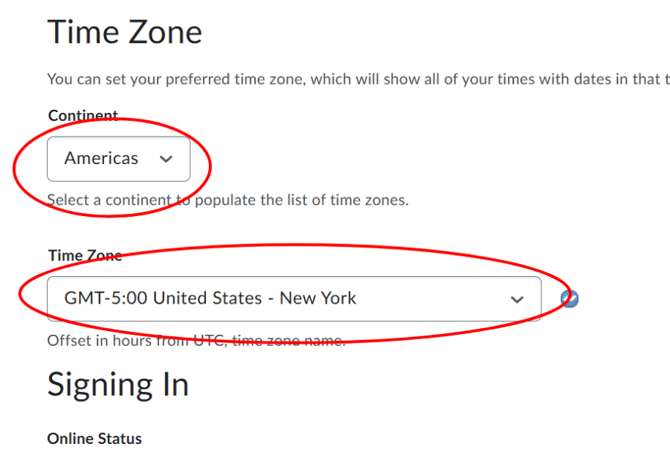
Step 7: Save Your Changes
Click "Save" to apply the change and remain on the page, or "Save and Close" to apply the change and return to the previous screen.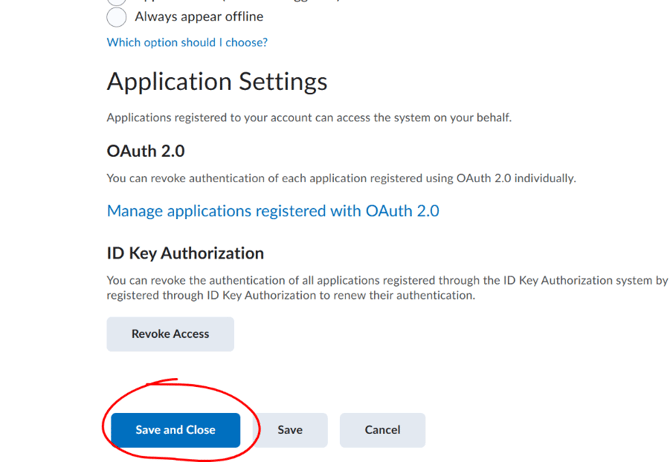
Step 8: Confirm the Update
Verify that dates and times shown elsewhere in Scholis (e.g., To Do List, Calendar) now reflect the newly selected time zone.
Notes
- Some courses may override your personal time zone selection with a course-specific setting.
- The Time Zone field defaults to your organization's setting until changed.
- If you cannot locate this option, contact Helpdesk for support.